So, you've just bought a shiny new turntable, but you're unsure where to start. Or maybe you want to make sure it's sounding as good as it should.
Setting up a turntable correctly can make a huge difference in audio quality, so let’s walk you through the key steps to get you spinning vinyl in no time.
Keep scrolling for our full video breakdown.
1. Unbox and Organize Your Turntable Components


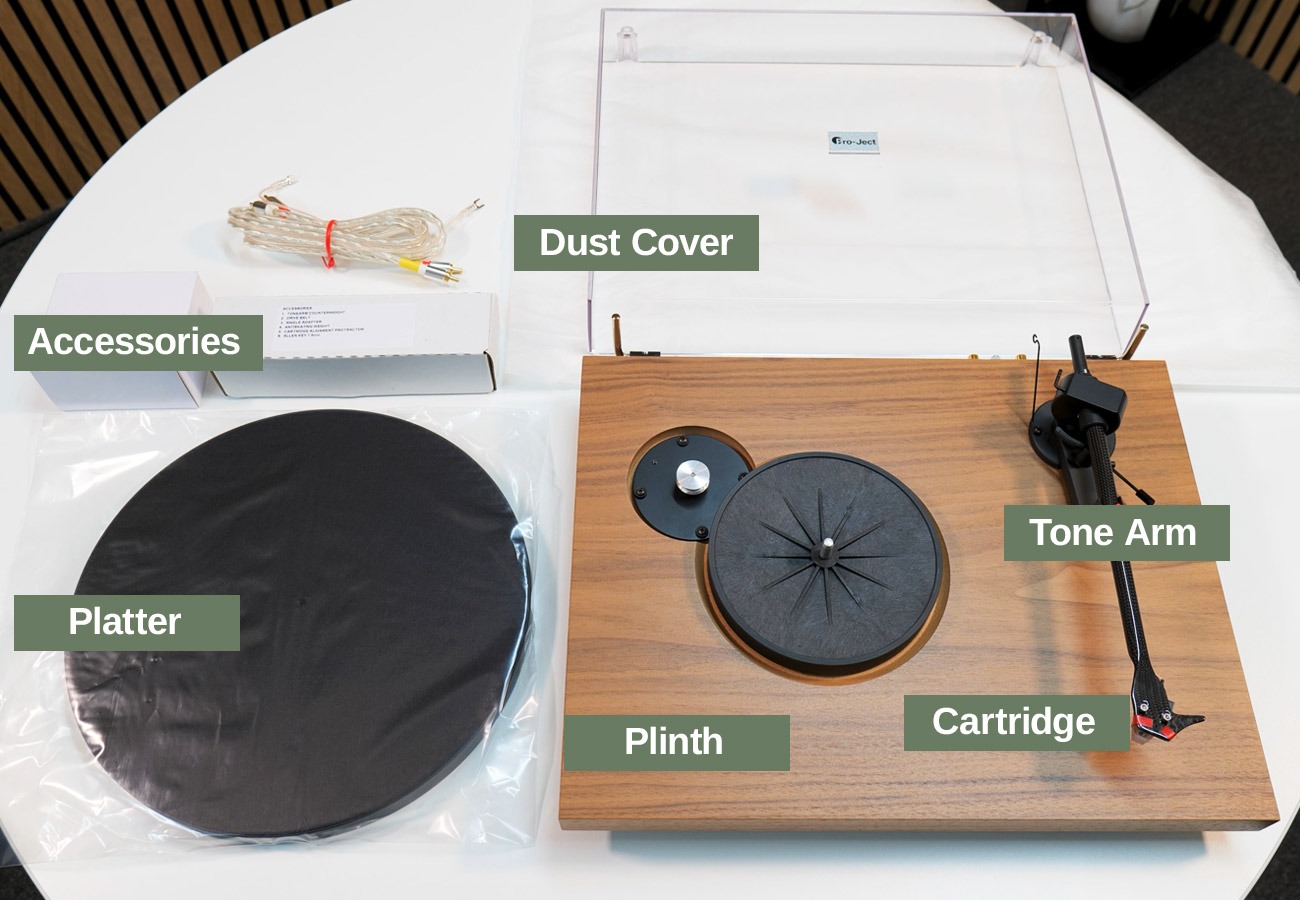
Start by laying out all the parts to see what you're working with. Take your time—turntables are delicate machines with small, precision components that can easily break. Make sure you have a clean, flat workspace and enough time to go through the setup without rushing.
2. Install the Drive Belt and Platter
If you have a belt-driven turntable, like the Project Debut Evo 2, you'll find a drive belt in the accessories box. Simply loop the belt around the platter and the motor pulley. Some turntables come with an automatic speed selector, while others have a manual speed switch on the pulley. Once the belt is in place, you can gently slide the platter onto the central spindle.
3. Attach the Counterweight and Balance the Tonearm
The counterweight is crucial for ensuring the stylus applies the correct tracking force on the record grooves. Too little force, and the stylus might skip; too much force could damage your vinyl.
• Slide the counterweight onto the back of the tonearm, turning it until the tonearm floats horizontally when lifted.
• Hold the weight steady and rotate the numbered gauge to set it to zero. Then, turn the counterweight to the recommended tracking force (e.g., 1.8g for the Pick It MM Evo cartridge).
• For better accuracy, consider using a digital stylus tracking gauge.
Our video at the end of this blog illustrates this process best.
4. Set the Anti-Skate Mechanism


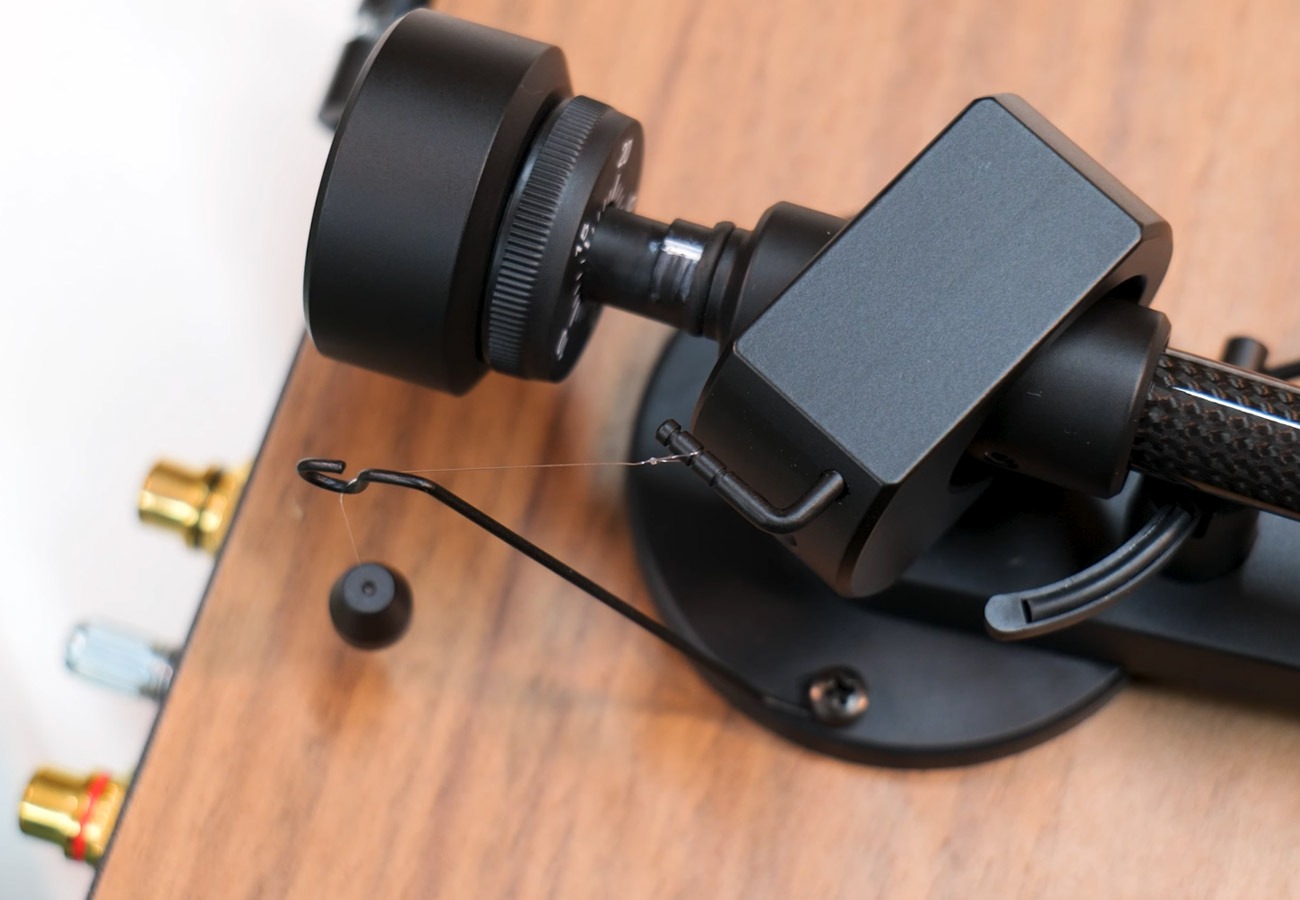
To prevent the tonearm from naturally drifting towards the centre of the record, you'll need to set the anti-skate. Some turntables have a dial, while others (like the Project Debut Evo 2) use a small weight attached by a thin wire. Hook the wire onto the correct notch on the post behind the tonearm, corresponding to the tracking force.
If your turntable has a dial for anti skate, like on a Technics turntable, set this to the correct number corresponding with the instructions in your user manual. It will be different depending on the tracking force you've set.
5. Check Cartridge Alignment
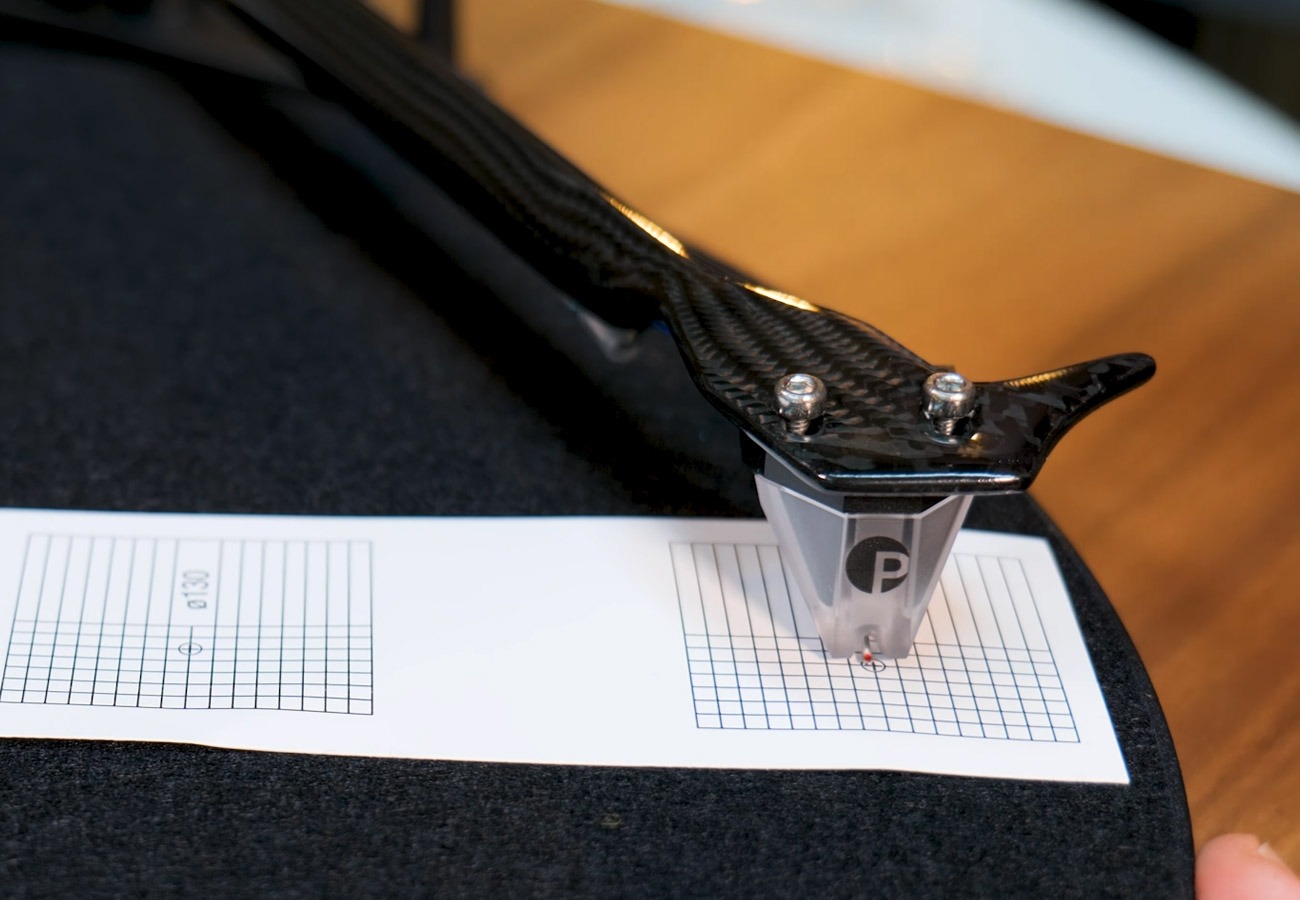
For optimal sound quality and minimal record wear, the cartridge should be correctly aligned. If your turntable doesn’t come pre-installed with a cartridge, secure it with the included bolts, making sure they’re snug but not over-tightened. Use an alignment protractor to ensure the cartridge body lines up perfectly with the grid on both the outer and inner points. Adjust as needed.


6. Connect the Cables and Position Your Turntable
Connect the RCA phono leads (red to right, white to left) and the ground wire to eliminate any hum. Place the turntable on a solid, level surface to minimize vibrations and avoid audio distortion.
7. Final Touches and Listening Tips
Once everything’s connected, power up your amplifier and lower the stylus onto your favourite record. You can choose to play with the dust cover up or down, depending on your preference for sound quality and protection.
Need More Help?
If you’re still unsure about setting up your turntable, check out our in-depth YouTube video guide for a step-by-step visual walkthrough.